Vaccine Storage
| July 25, 2022
| Medi-Products
Vaccine Transport During Emergency: Best Alternative Way
Power outages happen. Whether due to extreme weather conditions, natural disasters, or equipment breakdown, they happen. So, as a person running a healthcare facility or medical center, you should prepare for these power outages to the best of your ability.
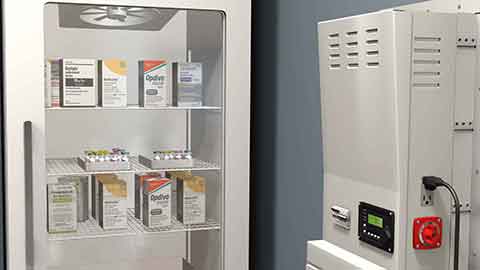
Different methods of dealing with power outages exist, such as having an emergency power supply system, which could be a standard power generating system or a vaccine refrigerator battery backup. However, suppose you are unable to set up a for one reason or the other. In that case, the next option you have is to store your vaccine in another facility, whose power supply is unaffected by whatever caused your facility's power outage.
Suppose your only option is moving your vaccines out of your facility. In that case, it is crucial to pack the vaccines in a way that will eliminate temperature excursions or at least minimize them while in transit. This article shows you how to set up your vaccine transport cooler to effectively eliminate temperature excursion or keep it at the barest minimum.
The Rule of Thumb is to Prepare For An Emergency Before It Happens.
Power outages are emergencies of the worst kind when you are in a business that relies solely on an uninterrupted power supply. A brief disruption in the power supply can compromise your vaccine storage and damage your vaccine supply, losing you tons of money and negatively impacting your company's bottom line.
For this reason, you must have a protocol for dealing with episodes of power outages or other forms of emergency events long before the actual event. Have an up-to-date emergency plan with steps you should take to protect your vaccines. During a power outage or an emergency event, activate your emergency plan immediately, complete with all the steps.
An effective emergency vaccine transportation plan has three stages, with steps you need to take. The stages are:
- Gathering the Supplies
- Packing the Vaccines for Transport
- Arriving at the Destination
Stage 1: Gathering the Supplies
The supplies you need for emergency vaccine transport must have been set aside long before the emergency event so that you simply have to go to your stash to get what you need when you need them. According to the CDC's Vaccine Storage and Handling Toolkit, these supplies are:
#1: Hard-sided Coolers or Styrofoam™ Vaccine Shipping Containers
Please make sure that the coolers you set aside are large enough to transport your center’s regular supply of refrigerated vaccines. You can also use the original vaccine shipping boxes if you kept them after receiving your vaccine supply (another reason to have had your plan in place long before the emergency event). Soft-sided collapsible coolers are inappropriate; DO NOT USE THEM.
#2: Conditioned Frozen Water Bottles
16.9 oz. water bottles will work for medium and large coolers, while 8 oz. water bottles will suffice for small coolers. Get enough of these bottles to have two layers inside the cooler. If you were thinking of reusing the coolant packs that came with the original vaccine shipping container, you can stop that line of thinking now. Those coolant packs will increase the chances of freezing your vaccines, which is a big ‘No-no’. Remember that the optimal temperature range for vaccine storage is 2oC to 8oC. So freezing is out of the question.
You must have had these conditioned water bottles frozen in your freezers before the emergency event (another reason to prepare ahead). The bottles can also help to regulate your freezer’s temperature.
Before using the water bottles, you need to condition them by putting them in a sink filled with several inches of cool or lukewarm water until you see a layer of water forming near the bottle's surface. Then, if the ice block inside the bottles spin freely when you rotate them in your hand, you are good to go. Using the frozen water bottles in their frozen state without conditioning them increases the risk of vaccines freezing.
#3: Insulating Material
Materials that work include bubble wraps, packing foams, or Styrofoam, at least one inch thick. You need two of any of them – one for a layer above and one for a layer below the vaccines. Packing peanuts or other loose material that might shift during transport are unsuitable.
You also need two pieces of corrugated cardboard cut to fit the interior dimensions of your cooler(s), between the conditioned water bottles and the packing material.
#4: Temperature Monitoring Device
You need a Digital Data Logger (DDL) with a buffered probe. Its accuracy should be about +/- 1oF (+/- 0.5oC) and should have a current and valid certificate of calibration testing. You should have pre-chilled your buffered probe for at least five hours in the refrigerator. Also, you can use a temperature monitoring device currently stored in your refrigerator, provided there is another device in the refrigerator to measure temps for any remaining vaccines.
Stage 2: Packing for Transport
Follow the steps below to pack your vaccines for transport:
- Line the bottom of your cooler with a single layer of conditioned water bottles.
- Place one sheet of corrugated cardboard over the water bottles to cover them completely.
- Place a layer of bubble wrap, packing foam or Styrofoam on top of the cardboard. Ensure that the wrap, foam or Styrofoam is at least one inch thick and covers the cardboard completely.
- Stack boxes of vaccines and diluents on top of the insulating material until the cooler is halfway full.
- Place the DDL buffered probe in the center of the vaccines, but keep the DDL display outside the cooler until you are done with loading.
- Add the remaining vaccines and diluents to the cooler, covering the DDL probe.
- Cover the vaccines with another one-inch layer of bubble wrap, packing foam or Styrofoam.
- Place another sheet of corrugated cardboard over the wrap, packing foam or Styrofoam.
- Fill the remaining space in the cooler with another layer of conditioned frozen water bottles.
- Close the cooler lid and attach the DDL display and temperature log on top of the lid.
Stage 3: Arriving at the Destination
Record the date, time, temperature, and your initials on the vaccine temperature log upon arrival at your destination.
Transfer the boxes into the storage refrigerator quickly.
If you experienced a temperature excursion while in transit, follow your protocol for dealing with temperature excursions. If you do not have one, click here (link to the article on vaccine storage and dealing with temperature excursions coming soon..) for how to develop one.